

The Odoo ERP lets you extend its functionality with custom add-ons developed by third parties (Third Party apps). For an efficient organization, it is important to arrange these add-ons properly within Odoo's directory structure. This article provides a step-by-step guide to adding a new folder to the third-party add-ons directory in Odoo 16.
Identify the correct Odoo directory
The first step is to locate the directory where Odoo stores its add-ons. By default, the add-ons directory in Odoo 16 is usually found in the Odoo installation path. This directory holds all add-ons, including Odoo's core modules and the third-party add-ons you install.
By "Directory" we mean a folder within the set of folders that make up your Odoo installation.
Step 1: Create a new Folder
Navigate to the add-ons directory and create a new folder to hold your third-party add-ons. Choose a meaningful, descriptive name that reflects the purpose or source of the add-ons you plan to store in it. For example, you can name it "ganemo_addons", "community_addons" or "addons_ganemo".
On Linux you can create a custom add-ons folder here using the following command:
sudo mkdir /../../odoo/<custom_addons>
sudo chown -R odoo:odoo /../../odoo/<addons_ganemo>
Now you need to add the path 'addons_ganemo' to the "Path" in the 'config' file.
Edit 'addons_path' and add the paths of the folders you created.
sudo scp -r <custom module>// root@<ip_address>:/../../odoo/<custom_addons>/
Step 2: Download the add-on files
Get the necessary add-on files from the third-party source. This may involve downloading them from a website or obtaining them from a developer. Make sure you have the complete set of files, which typically includes Python, XML and any other resources or dependencies required.
For example, if you buy a module from the Odoo Apps store, you download a .zip file which, when extracted, gives you access to a folder containing all the module's files. This folder is usually the module itself.
For example, if you buy a module from Ganemo, you will be given access to a folder where you can download compressed files containing Ganemo's modules.
Below is an example showing the compressed file you receive from Ganemo:

When you download and extract the compressed file, you will see one or more folders, and each one contains a module. In the following example, three folders representing three modules are shown:

Each folder contains all the files needed for the add-on.
CAUTION:
What you copy into the "Folder" created in the previous step is the entire module folder. To make sure a folder contains a module, open it and you will find a file called "__manifest__". For example, when I open the "amount_to_text" folder, I see the following:
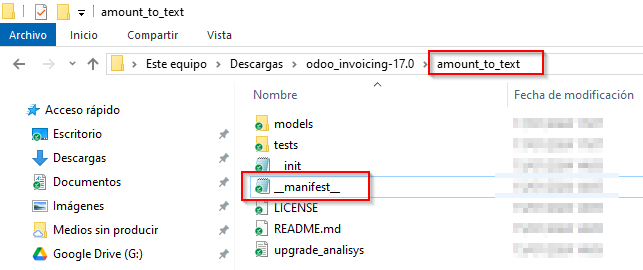
Since I find a file called "__manifest__", this folder (amount_to_text) is the one containing the module, so I should copy the directory created in STEP 1 above, as explained in the following STEP 3.
For example, if you receive a compressed file (.zip or .rar) that, when extracted, shows a folder and you are not sure whether the module is that folder or the folders inside it, simply check which folder contains the "__manifest__" file.
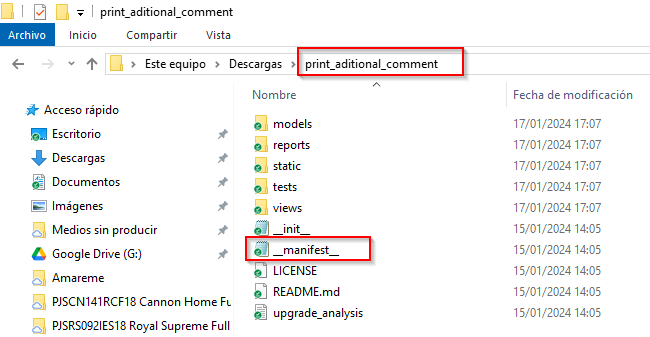
Step 3: Add module(s) to the new Folder
Move or copy the add-on files you downloaded in STEP 2 into the folder created in STEP 1 inside the add-ons directory. Make sure all the necessary files are present and that the add-on's folder structure stays intact. Maintaining the proper structure is crucial to avoid problems with dependencies or module organization.
Step 4: Update the Odoo add-on list
So that Odoo is aware of the new folder and its add-ons, you need to update the add-on list. Access the Odoo backend with the "Developer" mode enabled and go to the settings menu. From there, select the "Apps" option and click the "Update Apps List" button. This process updates the add-on list, including the newly added folder and its contents.
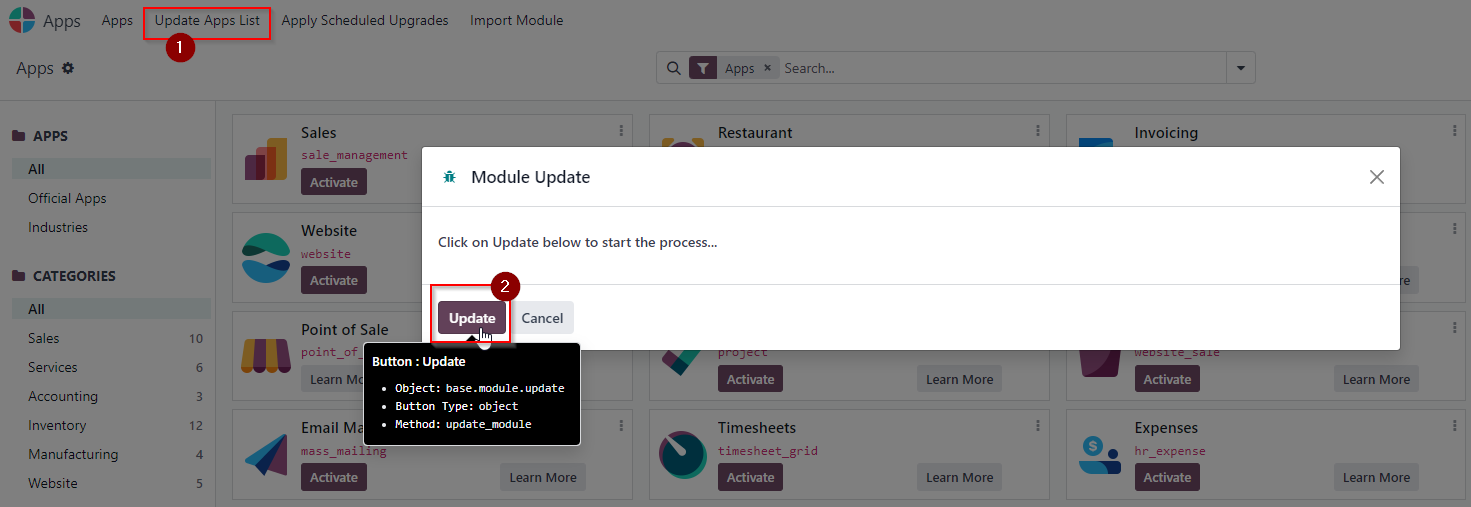
Step 5: Install and configure the add-ons
With the add-on list updated, you can now install and configure the newly added add-ons. With the developer mode active, go to the "Apps" menu, find the add-ons inside the newly created folder and click the "Install" button next to each one. Once installed, access the configuration options the add-ons offer, usually available through the settings menu, and adjust them to suit your business needs.
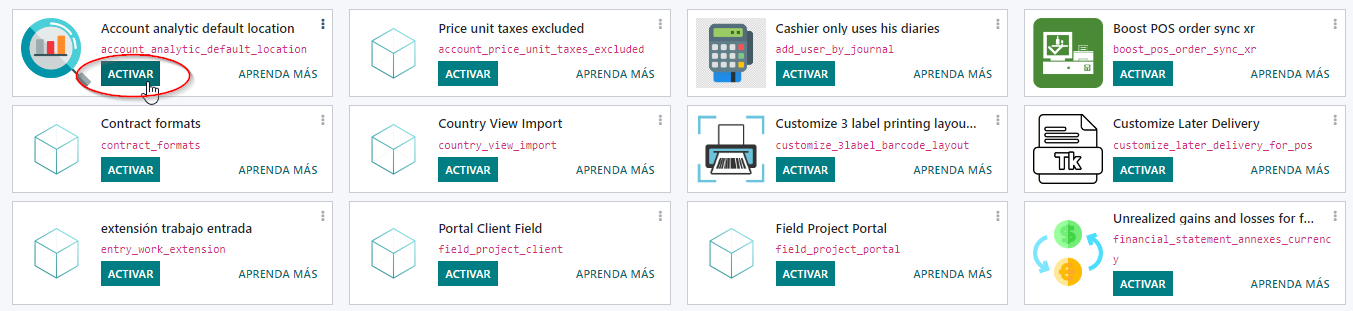
Step 6: Test and deploy
After installing and configuring the add-ons, it is crucial to thoroughly test their functionality before deploying them to a production environment. Create test scenarios and make sure the add-ons work as expected, interacting smoothly with other modules and meeting your business needs. Once you are satisfied with their performance, you can deploy the third-party add-ons for use by your organization.
Conclusion
By following this step-by-step guide, you can effectively add a new folder to the third-party add-ons directory in Odoo. Keeping your third-party add-ons well organized makes maintenance easier, improves module management and facilitates collaboration with third-party developers. Remember to keep your add-ons updated and run periodic tests to ensure a smooth and efficient experience with Odoo and its extended functionality.
Adding modules requires more advanced knowledge. If you don't know how to do it and don't have anyone to help you, it may be worth having Ganemo manage your server, which includes, among other things, adding modules. To do so, hire our "DevOps Essential" service and request your quote at leads@ganemo.co or via our commercial WhatsApp +51 946377197